

Fibreglass Stage Gate
Have you ever wanted to understand the fibreglass repair process, well here it is!! This was an above waterline non-structural chip repair. If the repair was in a structural part of the ski or hull this would require fibreglass resin and re-inforce fibre matt to bring back the composition strength.

Non Structural damaged caused to Jetksi, top combing. To protect any mouldings, trims or gunnel rubbers tape up affected area.

Apply filler with a applicator, ensuring you keep filler away from mouldings etc.

Scribe with a pencil arras rounded smooth edges

Remove protective masking tapes and throughly with air around any fixings.

Re-Guide coat. You will also note the primer was taken out past the damaged area.

Ensure you have full coverage with colour and you can no longer see any undercoat.

Using the spray gun you can blow down and tack any small bits of dust or lint.

There was also a small chip on the inside, again not a lot of product is required for the small clear blend.

Note the clear has been wet out over a larger area and blended to infinity.

Feather the damaged area ensuring you remove any fractured or flaky fibreglass.

When dry, approximately 15 minutes, block sand with 180g.

Spray on light guide coat.

Re-tape, ensuring masking tape is only on moulding and not touching fibreglass product that has been repaired. An applicator can tuck tape in neatly.

Wet or dry rub with 400g until the substrate is flat and featered. Clean up and re-tape for final spray including soft edging for back masking.

As you wet the final colour coat out you can peel back the back roll where you will re-overcoat with clear coat.

Start applying the clear top coat.

First clear coat and leave for approx 10 minutes.

Once dry, carefully remove protective masking and taping. Detail your final product if required.

After feathering and removing any loose flakes ensure the composition is dry.

Re-apply a top coat fine fill filler. Note - alwaysclean applicators between use so that they fair the fillers down smooth.

Re-block with 240g removing black guide coat.

Tape up surrounding area to ensure no overspray and spray with primer.

Apply colour matched base coat, allowing to dry between coats.
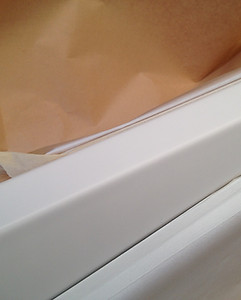
This image shows the back roll is high on the inner of the face that has not been damaged therefore does not require painting.

Where you are doing wet outs you require less clear.

Second clear top coat application.

Mix up some fibral fill (this is a reinforced filler).

Re block sand with 180g, leaving the repair slightly full.

Lightly sand arras edge. Do not oversand these areas.

Heat gun can assist in speeding up the drying time. Flow heat across the undercoat paint and not directly at it.

Normally 3 to 4 coats and blend colour.

Note you will see the 2inch backroll of masking tape is soft and there is no sharp hard edges.

Note the careful taping up for a nice clean job.

Note the top back roll has been removed for these coats.